Most of the time you can update your WordPress website while it’s live. However, sometimes you’ll need to make dramatic changes that could cause downtime, bugs, or other unpredictable behavior while the modifications are in progress.
Fortunately, you don’t have to make risky changes to a live website. By putting WordPress into maintenance mode, you can work on your site in a secure, private environment, then relaunch it when you’re confident it can deliver the five-star experience your visitors have come to expect.
In this article, we’ll show you how to design and build a custom maintenance mode page for your WordPress website. We will then explore ways to create a more engaging experience for visitors by adding a countdown and notifying them as soon as your site is back online. Let’s get started!
An Introduction to WordPress Maintenance Mode (And Why You Might Want to Implement It)
In many cases, it’s not a problem to make minor edits to your site while it’s live. For example, you might publish a new blog postA post is a type of content in WordPress, a popular open-source content management system used for creating an... More, update your plugins, or perform other adjustments without having to take your site offline. However, occasionally you may need to make changes that could potentially break your website or cause bugs.
If you keep your site online while making these critical changes, you run the risk of delivering a bad User Experience (UX). Any users who run into strange behavior while looking at your pagesIn WordPress, a page is a content type that is used to create non-dynamic pages on a website. Pages are typica... More may suspect that your site has been hacked. First-time visitors may even conclude that this is normal for your website and never give you a chance to prove otherwise.
If you need to perform any in-depth, complex, or risky changes, then it’s smart to put your site into maintenance mode first. That way, anyone who tries to access your site will encounter a splash screen. Many website owners use this opportunity to display a graphic or message informing visitors that their site is temporarily down for routine maintenance:

You can then perform essential maintenance work without risking your UX. This splash screen also gives you an opportunity to communicate that your site isn’t broken or under attack, and that normal service will resume shortly. You might even specify a time when your website will be back online.
Although your site is down for essential maintenance, this doesn’t mean you need to sacrifice all of your traffic and engagement during this period. If you run multiple related websites then you might use the splash screen to suggest some other content that visitors can explore. Alternatively, you can encourage them to interact with you on social media or via email during this period.
How to Put WordPress into Maintenance Mode (In 4 Easy Steps)
There are several maintenance plugins available for WordPress. However, we’ll be using WP Maintenance Mode as it has everything you need to create a splash screen and enhance it with additional functionality. This includes adding a timer counting down to when your site will be back online.
You can also grant or deny access to your site based on visitors’ user permissions. This can be beneficial if your website is a collaborative effort.
After installing and activating the WP Maintenance Mode pluginA plugin is a software component that adds specific features and functionality to your WordPress website. Esse... More, you’re ready to get started.
Step 1: Design Your Splash Page
You’ll typically start by designing your maintenance splash page. In your WordPress dashboardIn WordPress, the Dashboard is a central hub for managing a website's content and settings. It is the first sc... More, navigate to Settings > WP Maintenance Mode > Design:
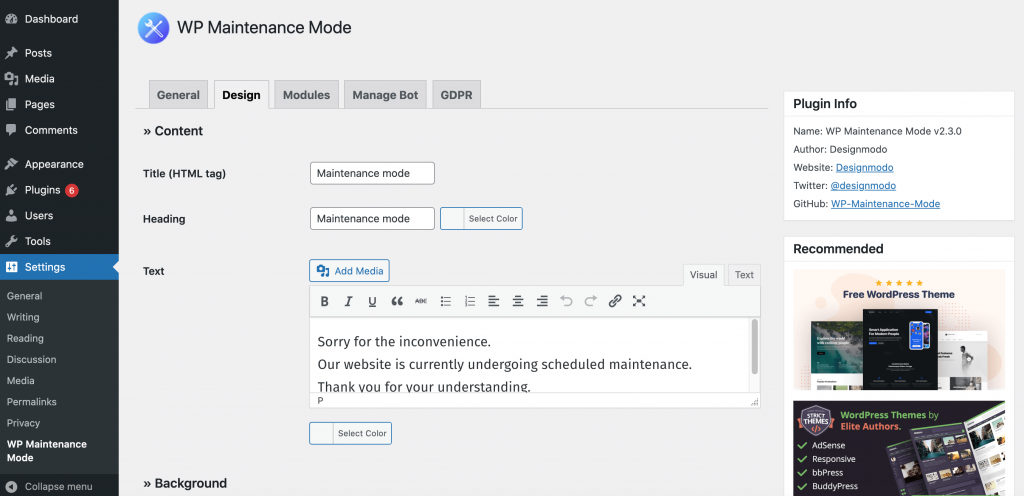
To start, provide a title and a heading for your maintenance page. You can then add some content using the familiar WordPress editor.
You can also specify a background color or upload an image to display as part of your maintenance page. If you don’t already have one in mind, WP Maintenance Mode provides several pre-built options:
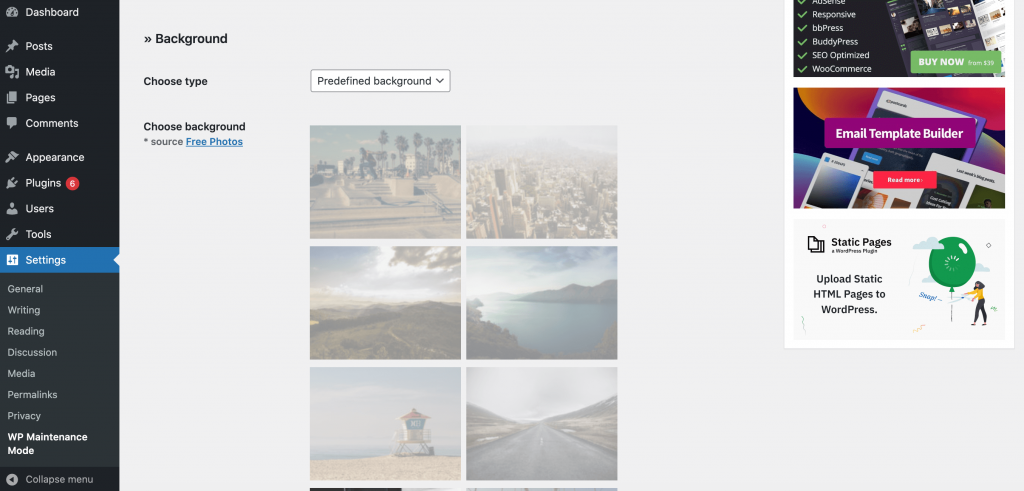
You can access these images by opening the Choose Type dropdown, and then selecting Predefined background. When you’re happy with your splash page, click on Save Settings.
Step 2: Add a Countdown
If you know when your site will be back online, you may want to consider adding a timer to your maintenance page. This can reassure your audience that you won’t be offline indefinitely. A clear deadline can also encourage customers to wait until your website reopens, rather than resorting to placing an order with your competitors.
Countdowns can also be useful for generating buzz around an exciting new change. For example, you might place your site into maintenance mode while you redesign its layout or add new products. In this scenario, you can use a countdown to create a sense of anticipation among your audience. This may result in a traffic spike once your site is back online.
To add a countdown to your maintenance page, select the Modules tab. You can then specify the time when the countdown should start using the Start date field:
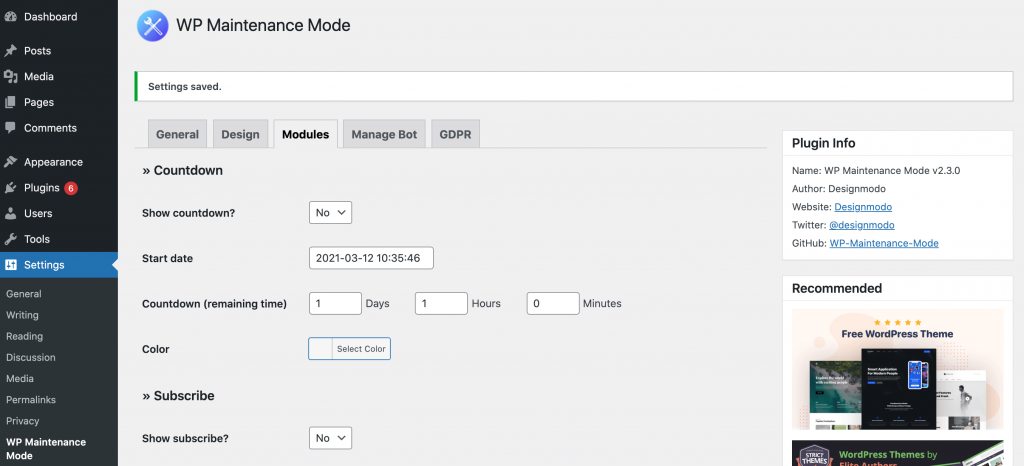
In Countdown, enter the amount of time remaining until the countdown expires. To add this timer to your splash screen, open the Show countdown dropdown and select Yes. As always, don’t forget to save your changes.
Step 3: Give Visitors the Option to Subscribe
Sometimes, you’ll complete maintenance tasks that have no impact on your website’s front end or the visitor experience. However, other maintenance tasks are visible to end users, such as adding new products to your WooCommerce store.
In these scenarios, your loyal customers may appreciate a heads-up when your site reopens for business. You can use the WP Maintenance Mode plugin to add an email subscription field to your splash page. Any visitor who enters their address into this form will receive a notification when your site comes back online:

You may also want to consider enabling email notifications if your site experiences a large volume of traffic or delivers critical services or products. Just be aware that subscribers will be notified directly from the WP Maintenance Mode plugin. This means that their contact information won’t be shared with any other mailing lists you’ve integrated with your site.
To enable this feature, navigate to Settings > WP Maintenance Mode > Modules. In the Subscribe section, enter the label that you want to display above your form:
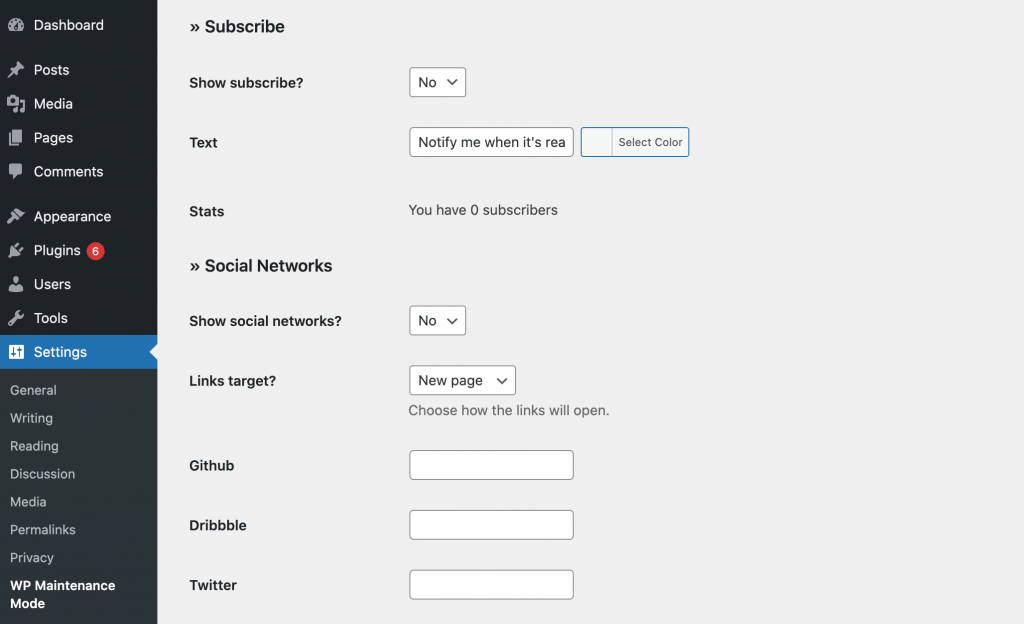
Next, open the Show subscribe dropdown and select Yes. The plugin will now add a subscription form to your splash page.
Step 4: Activate Maintenance Mode
Once you’ve configured your maintenance page, you can activate it at any time by navigating to Settings > WP Maintenance Mode. You can then select General:
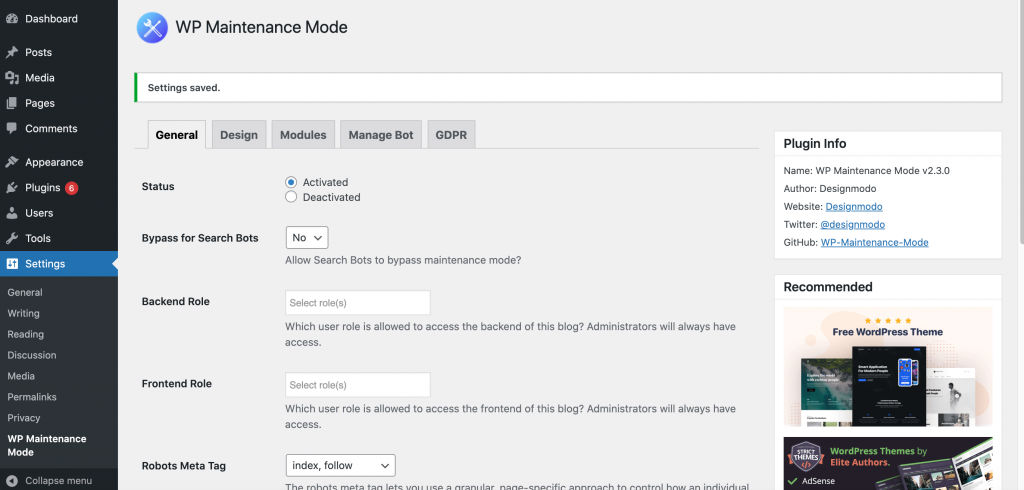
Before activating maintenance mode, you may want to consider enabling Bypass for Search Bots. This ensures that search engines can continue to see your site while it’s in maintenance mode. Keeping your content visible to these bots can be an important way to preserve your Search Engine Optimization (SEO).
By default, site administrators can access the WordPress back and front ends while your site is in maintenance mode. Alternatively, you can grant and deny access based on each user’s individual role:
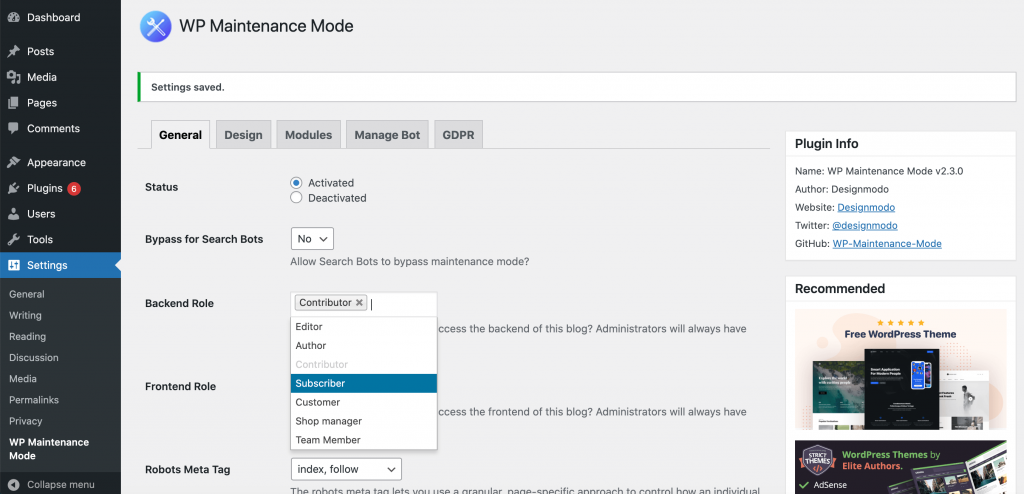
When you’re happy with how your maintenance mode settings are configured, activate it by selecting Save Settings. Your site is now down for maintenance.
How to Deactivate WordPress Maintenance Mode
After completing your maintenance tasks, we recommend carefully testing your site to ensure there are no issues with its UX. This step will vary depending on the changes you made.
Once you’ve verified that there are no issues with your site, it’s time to bring it out of maintenance mode. You can remove your splash screen at any point by navigating to Settings > WP Maintenance Mode > General. You can then select Deactivated and save your settings:

The plugin will then remove the splash screen, and visitors will be able to access your website. If you added a subscribe form to your splash page, everyone who entered their email address will also receive a notification that your content is available again.
Conclusion
Making drastic changes to your WordPress website can be a risky business. By placing your site into maintenance mode, you can make these updates in private, then relaunch your site when you’re confident about the quality of the visitor experience.
In this article, we showed you how to set up customer maintenance mode in four easy steps:
- Design your splash page using the WP Maintenance Mode plugin.
- Add a countdown to let visitors know when your site will be live again.
- Give visitors the option to subscribe for updates.
- Activate maintenance mode.
Do you have questions about creating a maintenance page for your WordPress website? Ask away in the commentsComments are a feature of WordPress that allow users to engage in discussions about the content of a website. ... More section below!


