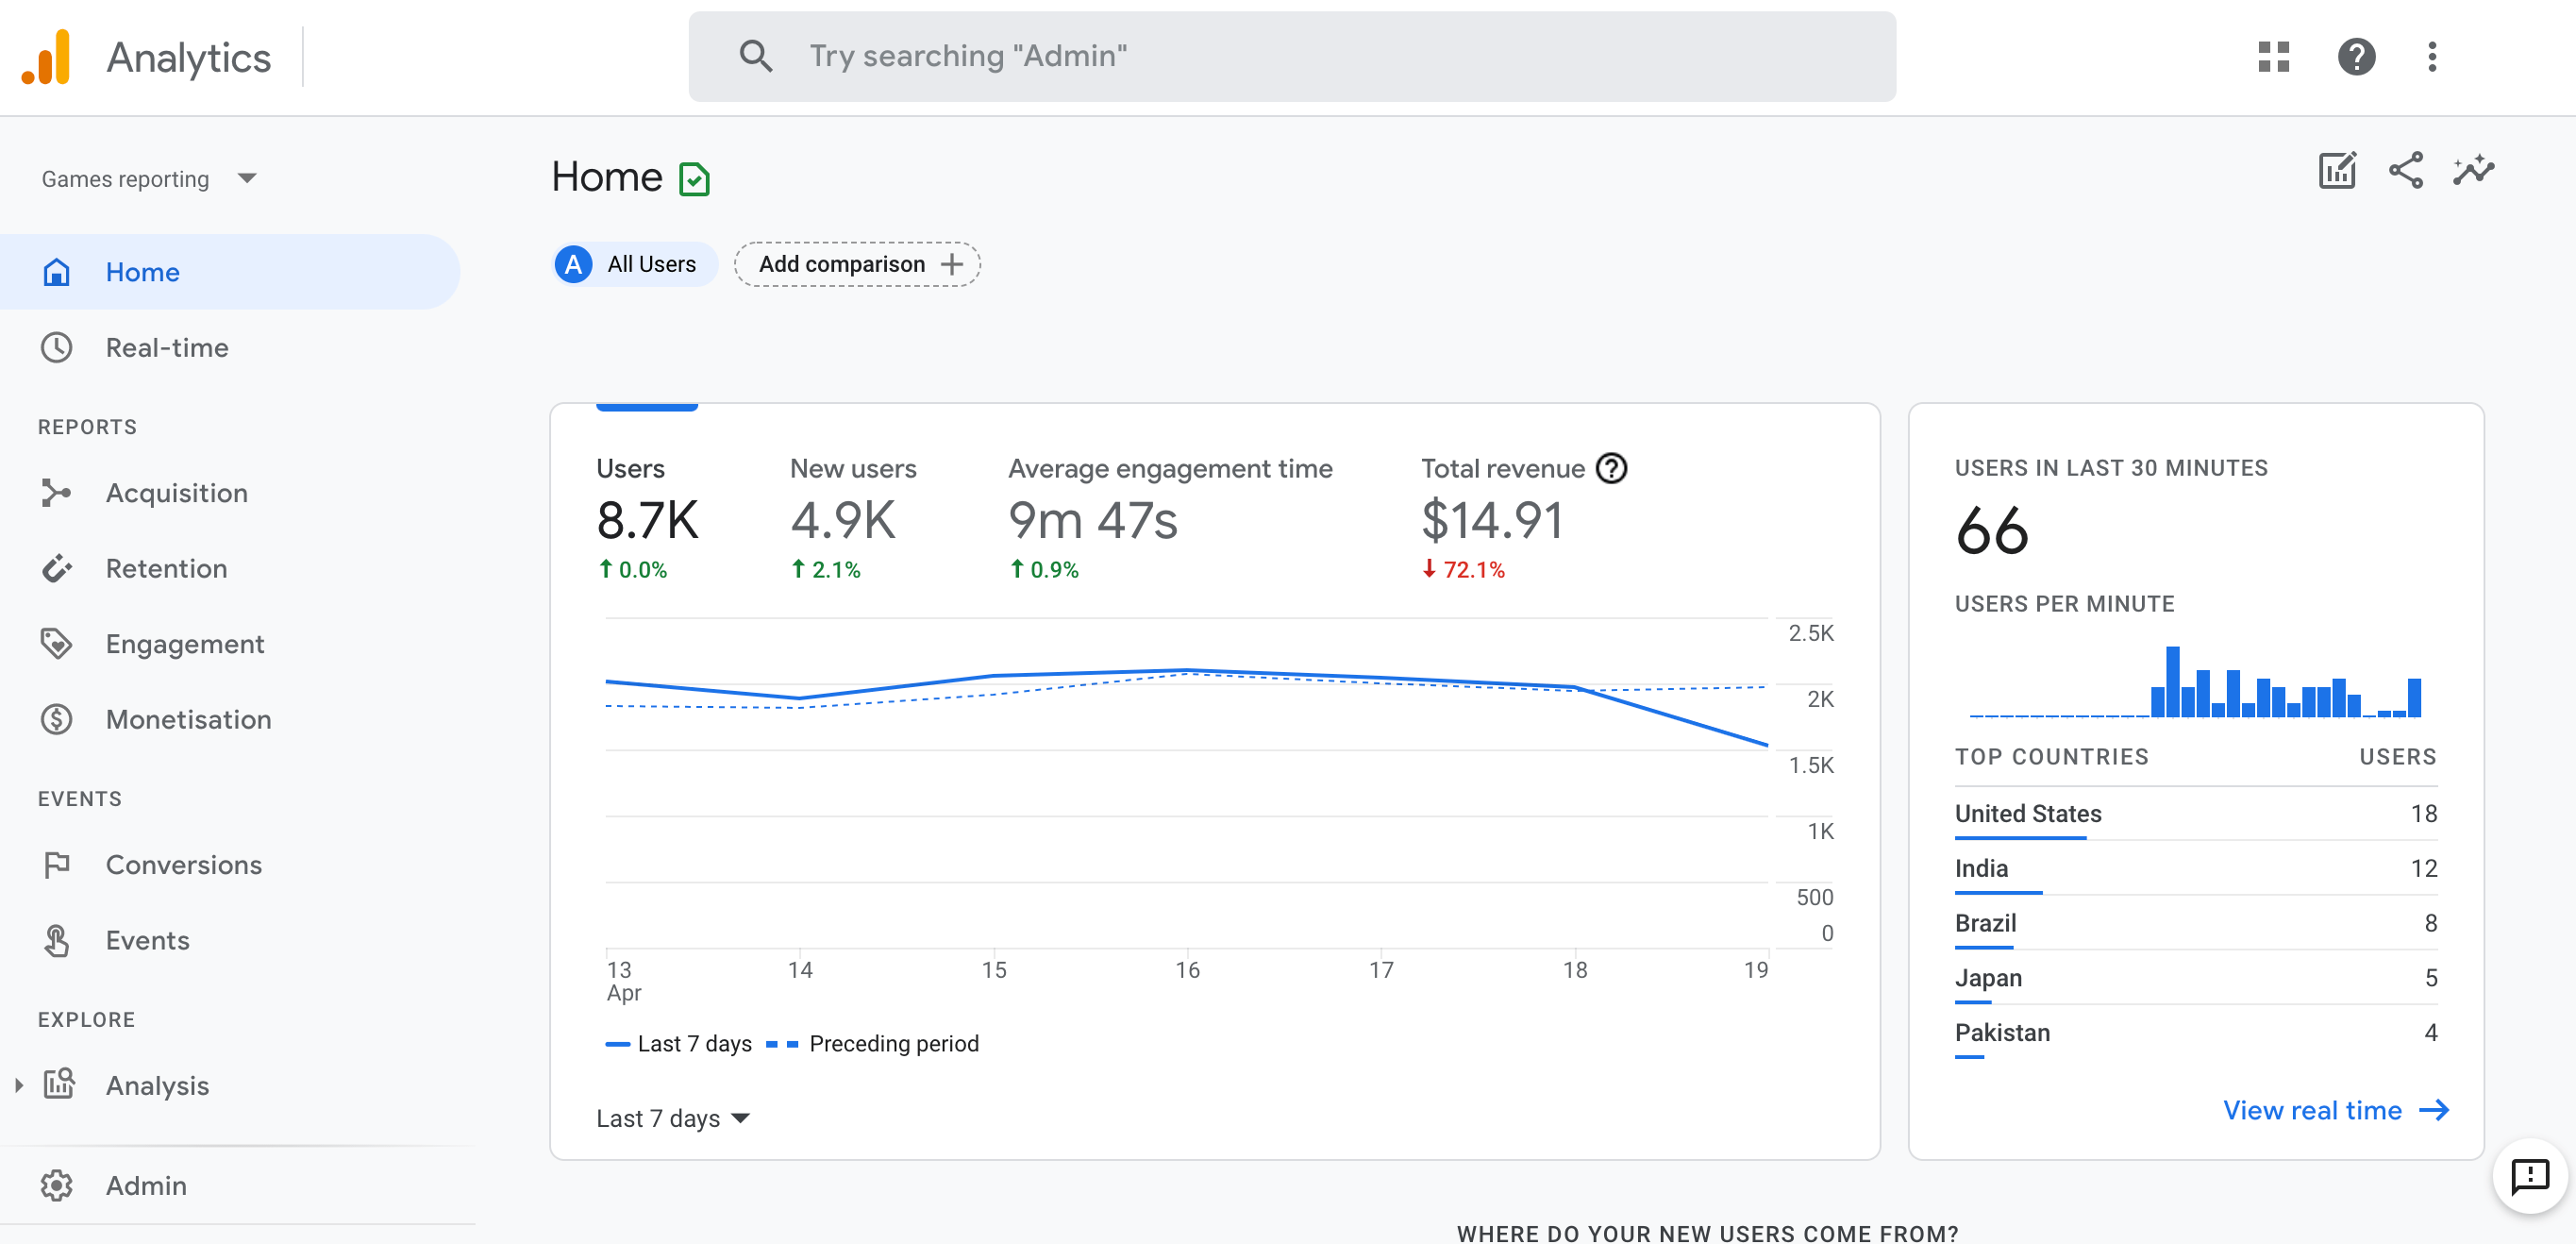
If you’re looking to monetize your WordPress site. Learning how to add AdSense code in WordPress is one of the easiest ways to start earning revenue through ads. While adding AdSense to your WordPress site might seem a bit technical at first. With the right guide, you’ll see that anyone can do it — even without being a coding expert. In this tutorial, I’ll walk you through how to add AdSense code in WordPress. From setting up your AdSense account to optimizing your ads for better performance and earnings.
Let’s dive in!
1. Setting Up a Google AdSense Account
Before you can add AdSense code to your WordPress site, you’ll need an AdSense account. If you don’t have one yet, don’t worry! Here’s how you can set it up:
Steps to Create a Google AdSense Account:
- Go to the Google AdSense website.
- Click Sign Up and fill in the required information about your website and yourself.
- Submit your application and wait for approval. This can take a few days, as Google will review your website to make sure it complies with their policies.
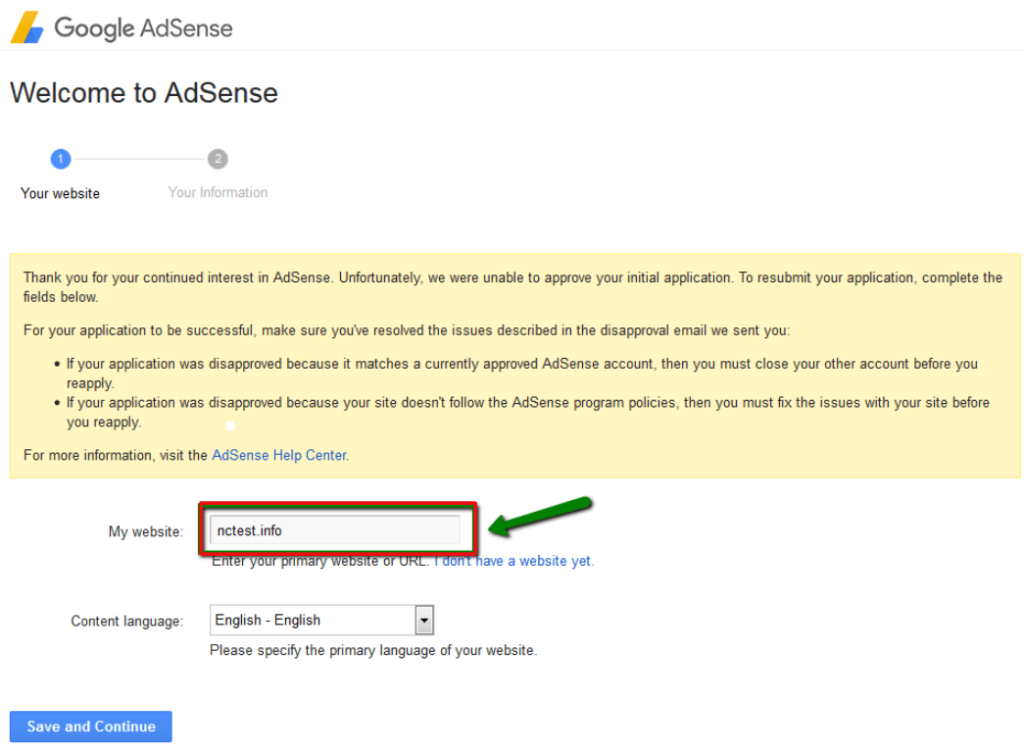
Tip: Make sure your site has quality content and complies with AdSense’s guidelines to avoid rejection.
Once approved, you’ll be able to access the AdSense dashboard and start creating ad units for your site.
2. Generating AdSense Code
Now that your account is set up, it’s time to create your ads. Google AdSense offers a range of ad formats like display ads, in-feed ads, and responsive ads. Responsive ads are highly recommended because they adjust automatically to fit the screen size, improving the user experience.
How to Generate the AdSense Code for Your WordPress Site:
- Log in to your Google AdSense account.
- Click on Ads in the left menuIn WordPress, a menu is a collection of links that are displayed as a navigation menu on a website. Menus are ... More.
- Select By ad unit, then choose the ad type you prefer (responsive ads are usually the best option).
- Name your ad unit and customize the size and type if needed.
- After creating your ad unit, click Save and get code.
- Copy the provided AdSense code.
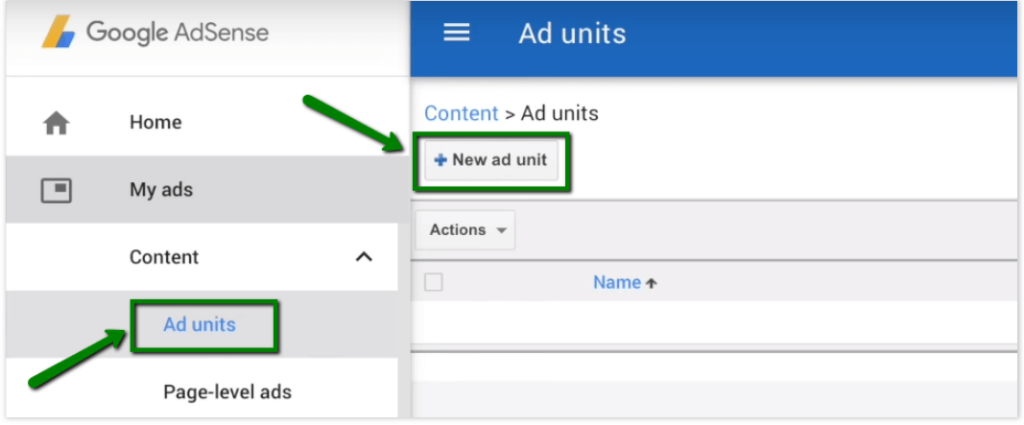
You’ll need this code to display ads on your WordPress site, so keep it handy!
3. Adding AdSense Code to WordPress Manually
If you prefer a hands-on approach, you can manually add the AdSense code to your WordPress themeA WordPress theme is a set of files that determine the design and layout of a website. It controls everything ... More. This method is straightforward and doesn’t require any plugins, but you’ll be editing your theme files directly. Be cautious to avoid making changes that could break your site.
How to Manually Add AdSense Code in WordPress:
- In your WordPress dashboardIn WordPress, the Dashboard is a central hub for managing a website's content and settings. It is the first sc... More, go to Appearance > Theme Editor.
- Look for the header.php or footer.php file.
- Paste the AdSense code you copied earlier right before the closing
</head>tagIn WordPress, tags are a taxonomy used to classify and organize posts. They are similar to categories, but unl... More (for header) or</body>tag (for footer), depending on where you want the ads to appear. - Click Update File.
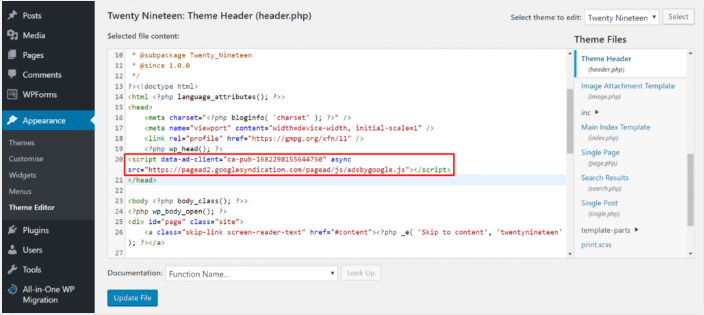
Tip: Placing the code in the header will ensure it loads on every pageIn WordPress, a page is a content type that is used to create non-dynamic pages on a website. Pages are typica... More of your site. Be mindful of where you place it to avoid disrupting the design of your site.
4. Using Plugins to Insert AdSense Code
If editing code isn’t your thing, don’t worry! There are plenty of WordPress plugins that can help you easily add AdSense to your site without touching any code.
How to Add AdSense Code in WordPress Using Plugins:
- In your WordPress dashboard, go to Plugins > Add New.
- Search for Ad Inserter or Site Kit by Google.
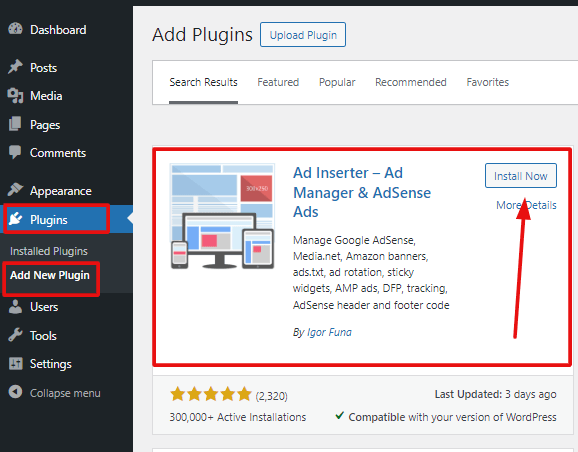
- Ad Inserter: This pluginA plugin is a software component that adds specific features and functionality to your WordPress website. Esse... More allows you to manage ad placement easily.
- Site Kit by Google: This plugin integrates directly with your AdSense account and other Google tools like Analytics.
- Install and activate your chosen plugin.
- After activation, follow the plugin’s setup guide to link your AdSense account and insert ads into your desired locations.
Using plugins makes it easy to manage and adjust your ad placements without the risk of breaking your site’s code. It’s also convenient for beginners who don’t want to deal with manual code insertion.
5. Best Practices for Ad Placement
Placing ads strategically can boost your revenue, but it’s important not to overload your site with ads, as this can turn off visitors. A good balance between content and ads will enhance user experience and ensure that you remain compliant with Google’s ad policies.
Where to Place AdSense Ads on Your WordPress Site:
- Above the Fold: Placing an ad in the visible area of the screen without scrolling (above the fold) often performs well.
- Within Content: Ads that appear in the middle of long blog postsA post is a type of content in WordPress, a popular open-source content management system used for creating an... More or after the first few paragraphs tend to get more clicks.
- Sidebar or Footer: These placements keep ads visible as users scroll and are less intrusive.
Remember: Google has strict rules about where and how many ads you can place on a single page. Overloading your site with ads can lead to penalties or account suspension, so be strategic and avoid cluttering the page.
6. Troubleshooting Common AdSense Issues
Sometimes things don’t go as smoothly as planned, and you might encounter issues after adding AdSense to WordPress. Here are some common problems and how to fix them:
Common Problems When Adding AdSense Code in WordPress (And How to Fix Them):
- Ads not showing up: This could be due to a delay in AdSense approval or an incorrect ad code placement. Double-check that your code is inserted correctly and give it time—ads usually appear within a few hours.
- Site rejection: If Google rejected your site, review their policy guidelines and make sure your content is high-quality, with a professional design and no policy violations.
- Site speed issues: If ads are causing slow loading times, consider using a caching plugin to improve performance.
7. Monitoring Ad Performance and Optimizing for Better Results
Once your ads are up and running, you’ll want to monitor their performance and optimize them to increase earnings. Google AdSense provides detailed reports on how your ads are performing, but you can also use other tools to get more insights.
How to Track and Improve Your AdSense Performance in WordPress:
- Use Google Analytics: Integrate your AdSense account with Google Analytics to get a deeper understanding of how visitors interact with your ads.
- A/B testing: Try testing different ad placements to see which spots generate the most clicks and revenue.
- Increase page views: The more traffic you have, the more chances your ads have to get clicked. Focus on growing your blog’s audience through SEO, social media, and quality content.
Conclusion
Adding AdSense code to your WordPress site isn’t as intimidating as it might seem at first. Whether you choose to manually insert the code or use a plugin, the key is to place your ads strategically and monitor their performance to ensure they’re bringing value without affecting user experience.
Now that you’ve got the steps down, it’s time to start monetizing your site! Follow the guide above, and you’ll be earning ad revenue in no time. Just remember to stay compliant with Google’s policies, and you’ll be good to go.
If you’re looking for fast WordPress hosting and a seamless way to add AdSense code in WordPress without worrying about technical updates, check out our hosting packages by clicking the button below:


