Maintaining a clean and professional-looking WordPress website is crucial. For both user experience and search engine optimization (SEO). One common issue that can detract from the user experience is the display of PHP errors on your site. These errors, while useful for developers during the development process, can be confusing and off-putting for visitors. In this article, we’ll guide you through the best practices for turning off PHP errors in WordPress, ensuring your site remains polished and professional.
Understanding how to manage PHP errors is essential not only for aesthetics but also for security. Displaying PHP errors can expose sensitive information about your site’s structure and vulnerabilities to potential attackers. By learning how to turn off these errors, you’ll enhance the security and credibility of your WordPress site, providing a seamless experience for your users.
What are PHP Errors?
PHP, or Hypertext Preprocessor is a server-side scripting language. Commonly used in WordPress to develop dynamic web content. A PHP error occurs when the PHP code encounters an issue that prevents it from executing properly. These errors can arise from various sources. Such as syntax errors, deprecated functions, or server configuration issues. When they occur, PHP errors are typically displayed on your WordPress site. Which can be both a blessing and a curse. They provide valuable debugging information. But can also be unsightly and confusing for visitors.
Common Types of PHP Errors
There are several types of PHP errors that you might encounter while managing a WordPress site. Understanding these can help you diagnose and resolve issues more efficiently:
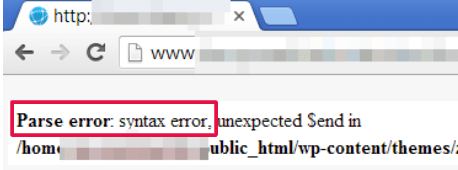
1. Parse Errors (Syntax Errors): These errors occur when there is a mistake in the code syntax. Common causes include missing semicolons, unmatched parentheses, or incorrect use of quotes.
2. Fatal Errors: These are critical errors that halt the execution of PHP scripts. They often occur when the script tries to call a non-existent function, class, or include file.
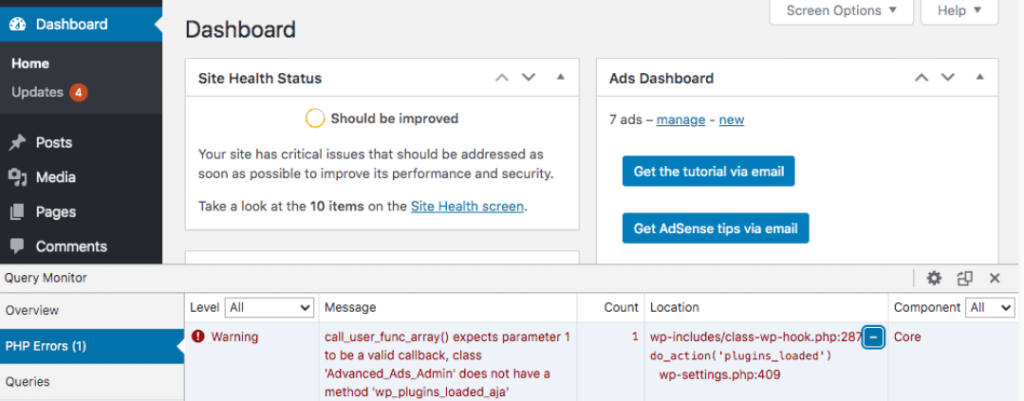
3. Warning Errors: These errors do not stop script execution but indicate potential issues. Warnings often arise from issues like missing files or incorrect function arguments.
4. Notice Errors: These are the least severe and usually indicate minor issues, such as the use of undefined variables. While they do not stop script execution, they can clutter your error logs and should be addressed for cleaner code.
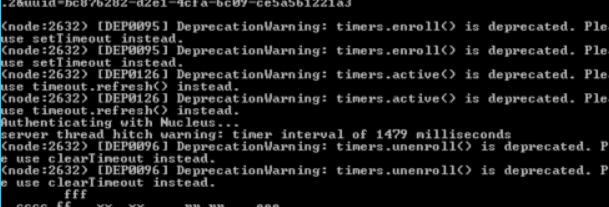
5. Deprecated Errors: These warnings inform you that the code uses functions or features. Which are no longer supported in the current version of PHP. While not immediately critical, deprecated errors suggest. You should update your code to maintain future compatibility.
Why You Might Want to Manage PHP Error
While PHP errors can be incredibly useful during development. They may not be desirable in a live WordPress environment for several reasons:
1. Professional Appearance: Displaying PHP errors on a live site can make it appear unprofessional. Visitors might see error messages that detract from the user experience.
2. Security Concerns: PHP errors can expose sensitive information about your site’s structure, server configuration, or file paths. This information could be exploited by malicious actors to compromise your site.

3. User Experience: Errors displayed on the front end can confuse visitors and reduce the overall usability of your website. This can lead to higher bounce rates and decreased user engagement.
4. Performance Issues: Continuous error logging and display can slightly impact your site’s performance. Especially if the errors are frequent. Disabling them can help ensure smoother operation.
By understanding the nature of PHP errors. And the potential impact they can have on your WordPress site. You are better equipped to manage them effectively. The next section will outline various methods to disable these errors. Allowing you to maintain a clean and professional online presence.
When You Should Disable PHP Errors in WordPress?
Knowing when to disable PHP errors is crucial for maintaining the right balance between development and production environments. During the development phase, having PHP errors turned on is beneficial as it helps you identify and fix issues quickly. However, once your site goes live, these errors should be turned off to prevent exposing sensitive information and to maintain a clean user interface.
It’s also important to suppress PHP errors when performing regular maintenance or updates. This ensures that temporary issues do not confuse or alarm your visitors. Regularly checking your error logs in a controlled environment allows you to stay on top of any issues without compromising the user experience on your live site.
How Do You Turn Off PHP Error in WordPress?
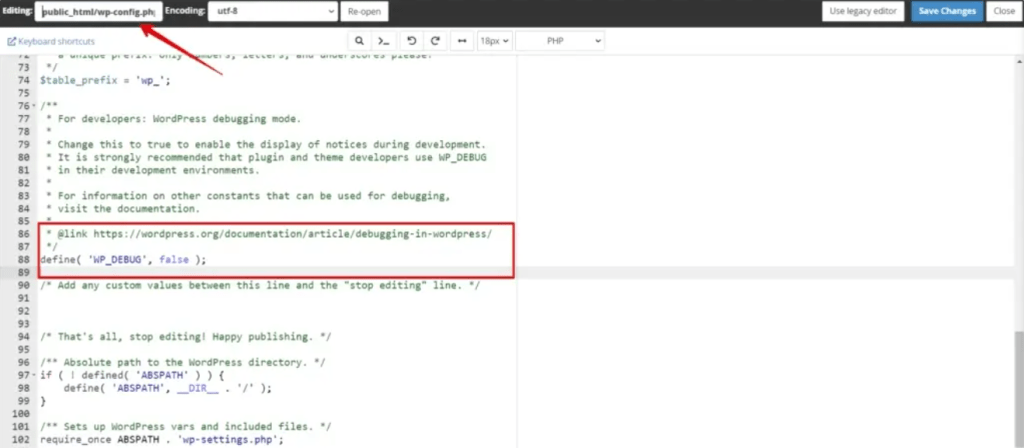
Turning off PHP errors in WordPress is a straightforward process that involves editing your site’s wp-config.php file. This file is located in the root directory of your WordPress installation. Before making any changes, it’s always a good idea to back up your site to prevent any accidental data loss.
To suppress PHP errors, open the wp-config.php file and add or modify the following lines of code:
error_reporting(0);
@ini_set('display_errors', 0);
define('WP_DEBUG', false);
This code disables error reporting and ensures that PHP errors are not displayed to your site’s visitors. After saving the changes, your site will no longer show PHP errors, providing a cleaner and more professional appearance to your users.
How to Confirm PHP Errors Are Disabled on Your WordPress Site
Disabling PHP errors on your WordPress site is an important step to improve security and user experience. But how can you ensure the errors are fully turned off? Follow these simple steps to verify that PHP error messages are no longer visible on your site.
1. Browse Your Website
Start by visiting various pagesIn WordPress, a page is a content type that is used to create non-dynamic pages on a website. Pages are typica... More on your site. Navigate through key sections, click on different features, and ensure comprehensive testing. This helps confirm that errors aren’t displayed in any part of your site.
2. Look for Error Messages
As you browse, pay attention to any pop-ups, warnings, or error messages on the pages. If no PHP-related messages appear, it’s a good sign that the errors are successfully disabled.
3. Use Browser Developer Tools
Open your browser’s developer tools (press F12 or right-click and select “Inspect”) to check the console for hidden issues. A clean console, free of PHP-related warnings, confirms the errors are no longer visible.
4. Review Your Server’s Error Log
Access the error logs via your hosting control panel or FTP. Verify that no new entries are being generated as you test your site. A quiet log file means PHP errors aren’t affecting the backend.
By following these steps, you can confidently ensure PHP errors are disabled, enhancing your site’s professionalism and delivering a seamless experience to your visitors.
How to Disable PHP Errors in WordPress Using cPanel
Encountering PHP errors on your WordPress site can disrupt the user experience and harm your site’s professionalism. Thankfully, disabling these errors via cPanel is a quick and straightforward process. Follow this step-by-step guide to ensure a seamless browsing experience for your visitors.
Step 1: Log Into Your cPanel
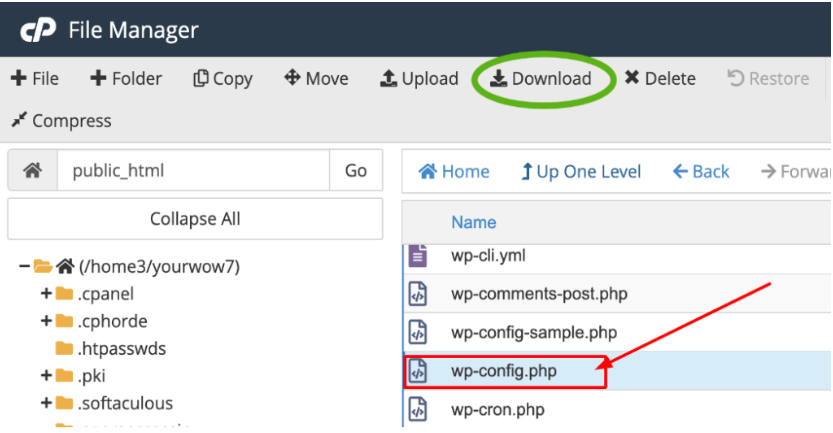
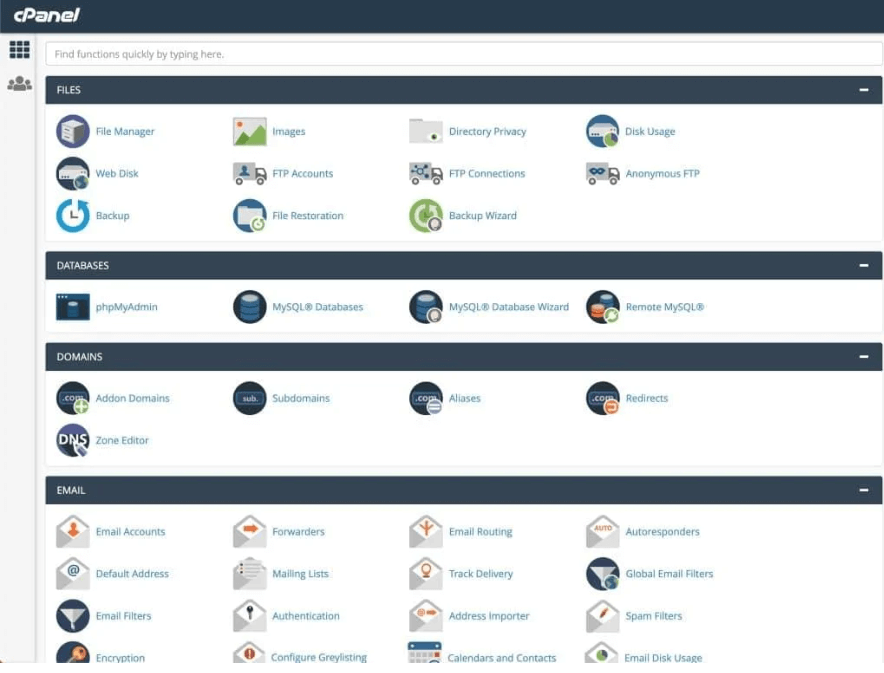
Start by logging into your cPanel with the credentials provided by your hosting provider. Once inside, locate the File Manager tool—this is where your WordPress files are stored.
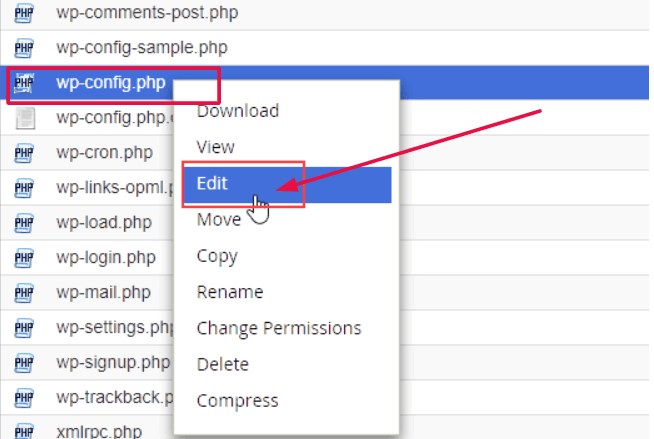
Step 2: Locate the wp-config.php File
In File Manager, navigate to the folder containing your WordPress installation. Most often, this is the public_html directory or a subdirectory if your WordPress site isn’t installed in the root.
Look for the wp-config.php file—it’s a critical configuration file that controls many aspects of your site.
Step 3: Edit wp-config.php
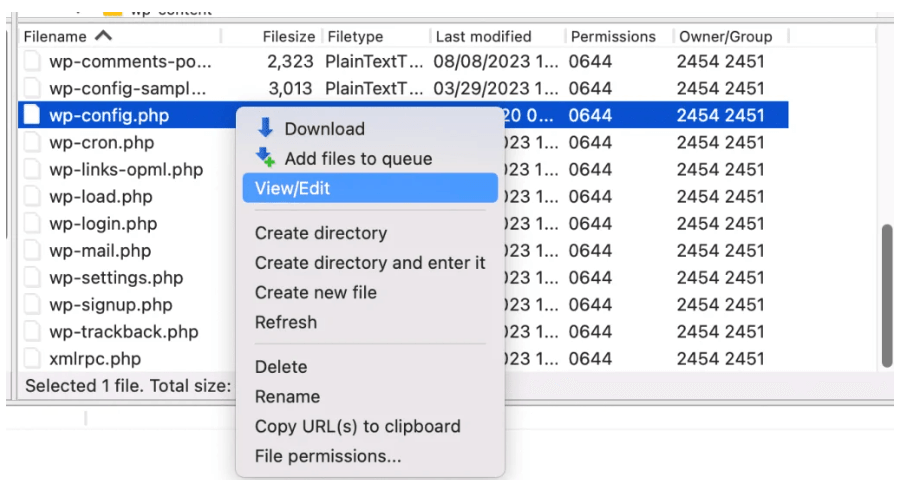
Right-click on the wp-config.php file and select Edit to open it in a text editor.
Search for any line resembling the following:
define(‘WP_DEBUG’, true);
Replace it with this updated code snippet to disable PHP error display:
ini_set(‘display_errors’, ‘Off’); ini_set(‘error_reporting’, E_ALL); define(‘WP_DEBUG’, false); define(‘WP_DEBUG_DISPLAY’, false);
Step 4: Save and Verify Changes
Click Save Changes to update the file. To confirm that the errors are disabled, navigate through different pages on your website. If error messages no longer appear, the process was successful.
Enhance Your WordPress Experience
By disabling PHP errors, you not only create a smoother experience for visitors but also protect your site’s professionalism. If the issue persists, reach out to your hosting provider’s support team for expert assistance.
Following these steps ensures your WordPress site runs smoothly without unnecessary interruptions, keeping both users and search engines happy.
How to Safely Locate and Edit the wp-config.php File in WordPress
Editing the wp-config.php file is a crucial step for managing core WordPress settings, but it requires precision to avoid errors. Follow this easy guide to find and modify the wp-config.php file securely.
Step 1: Access Your Hosting File Manager
-
Log into Your Hosting Account Start by logging into the control panel of your hosting provider. This is where you’ll manage your website’s core files and settings.
-
Open the File Manager Navigate to the File Manager tool, usually found under sections labeled “Files” or “File Management” in your hosting dashboard.
Step 2: Locate the wp-config.php File
-
Find Your Installation Directory Inside the File Manager, locate the directory where WordPress is installed. This is commonly the public_html folder or a specific subdirectory linked to your website.
-
Search for wp-config.php Once in the correct directory, look for the wp-config.php file—it’s typically found in the root folder of your WordPress installation.
Step 3: Edit the wp-config.php File
-
Select the File Right-click on the wp-config.php file to bring up a menuIn WordPress, a menu is a collection of links that are displayed as a navigation menu on a website. Menus are ... More of options.
-
Choose the Edit Option Click on “Edit” or “Code Edit” to open the file in an editor where you can safely make changes.
Pro Tips for Editing wp-config.php
-
Backup Before You Begin Always create a backup of the wp-config.php file before making any changes. This ensures you can restore your website if an issue arises.
-
Save and Test Your Changes After editing, save the file and check your website to confirm that everything functions correctly.
By carefully following these steps, you can confidently locate and edit the wp-config.php file to customize and optimize your WordPress website without unnecessary risks.
How to Access the WordPress Dashboard via cPanel
Accessing your WordPress dashboardIn WordPress, the Dashboard is a central hub for managing a website's content and settings. It is the first sc... More through cPanel is a straightforward process. Follow these steps to get started:
-
Log in to cPanel: Begin by visiting your web hosting provider’s website. Use your account credentials to log in to the cPanel interface.
-
Navigate to File Manager: Once logged in, find the “File Manager” option within the cPanel dashboard. This feature is typically listed under the “Files” section. Click on “File Manager” to continue.
-
Locate the WordPress Directory: In the File Manager, browse the directory where your WordPress files are stored. This is often within a folder named “public_html” or similar.
-
Adjust File Permissions (If Needed): Before accessing, ensure that your file permissions are correctly set. This step enhances security and prevents unauthorized access.
-
Access the Admin Panel: With everything in place, you can access the WordPress admin area by navigating to your site’s admin URL. This usually looks like ‘www.yourwebsite.com/wp-admin’.
Following these steps will help you reach your WordPress dashboard efficiently, allowing you to manage your site with ease.
Turning on PHP Errors in WordPress
While having PHP errors turned off is ideal for a live site, there are times when you might need to turn them back on, such as during development or troubleshooting. To enable PHP errors, you can modify the wp-config.php file again, setting the WP_DEBUG constant to true and adjusting the error reporting settings:
define('WP_DEBUG', true);
define('WP_DEBUG_DISPLAY', true);
@ini_set('display_errors', 1);
This will allow you to see PHP errors directly on your site, making it easier to identify and fix issues. Remember to turn off error reporting again before taking your site live to maintain a clean user experience.
Best Practices for Managing PHP Errors
Managing PHP errors effectively is crucial for maintaining the performance and security of your WordPress site. While disabling PHP errors can prevent them from displaying on the front end. It is important to handle errors responsibly to ensure that issues are resolved promptly. And do not affect your site’s functionality. Here are some best practices for managing errors in WordPress:
Keeping Error Logging Enabled
Even if you disable the display of PHP errors on your website, it’s vital to keep error logging enabled. Error logs provide valuable information about issues occurring within your site. Allowing you to diagnose and fix problems efficiently. To enable error logging:
1. Edit wp-config.php: Add the following code to your `wp-config.php` file to enable error logging and specify the log file location:
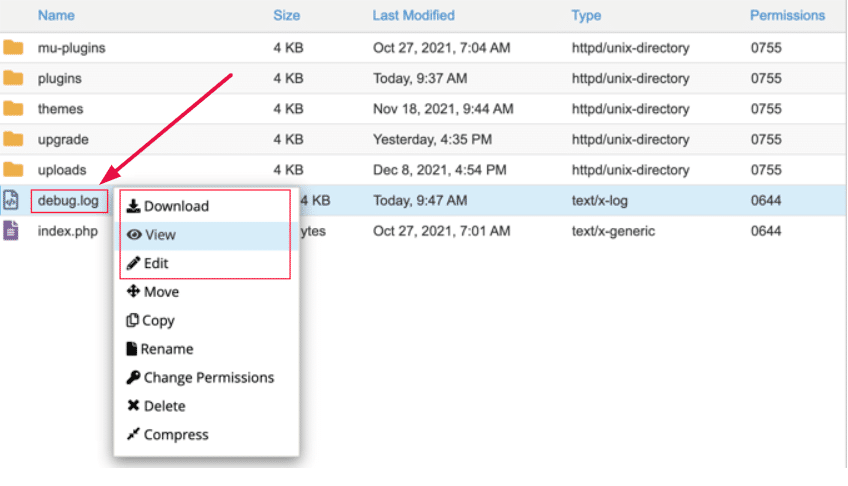
```php define('WP_DEBUG', true); define('WP_DEBUG_LOG', true); define('WP_DEBUG_DISPLAY', false); @ini_set('display_errors', 0); ```2. Check the Error Log: WordPress will create a `debug.log` file in the `wp-content` directory. Regularly check this file for any errors that need addressing. By keeping error logging enabled, you ensure that errors are documented. Making it easier to track and resolve issues without exposing error messages to your site visitors.
Regularly Updating WordPress and Plugins
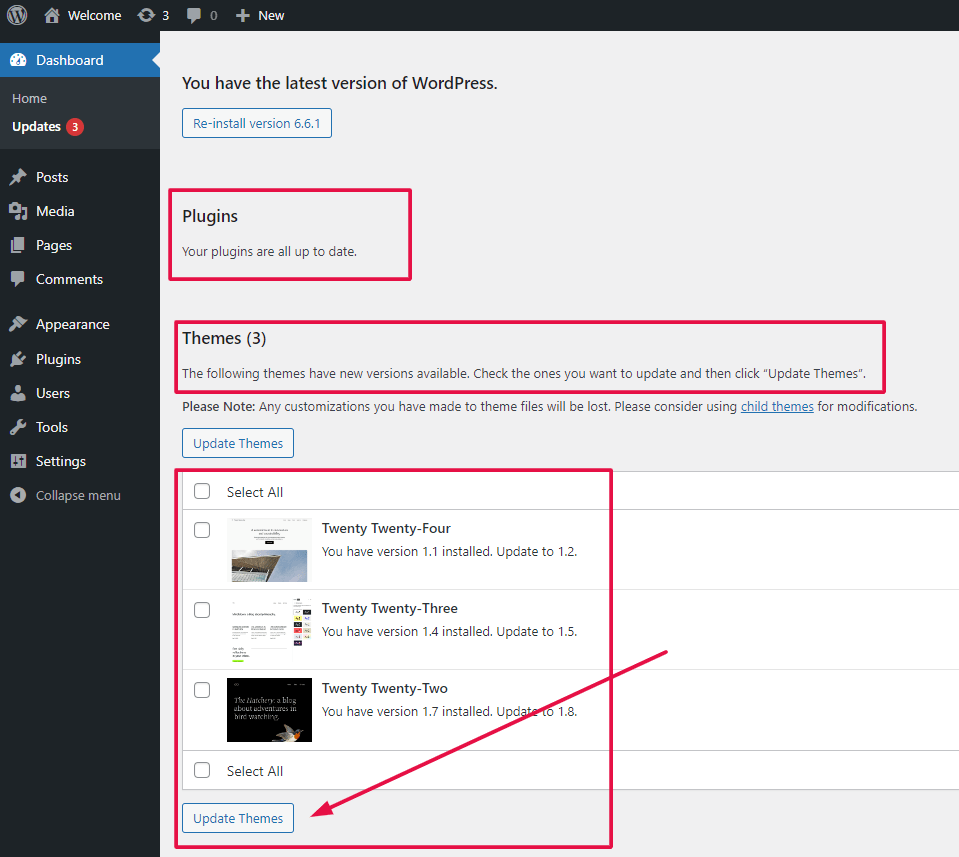
Outdated WordPress core files, themesA WordPress theme is a set of files that determine the design and layout of a website. It controls everything ... More, and plugins are common sources of PHP errors. Regular updates help fix bugs, enhance security, and improve compatibility. W hich can significantly reduce the occurrence of errors. Follow these steps to keep your site up to date:
1. Update WordPress Core: Always use the latest stable version of WordPress. You can update WordPress from the dashboard under `Dashboard` > `Updates`.
2. Update Themes and Plugins: Regularly check for updates to your themes and plugins. Navigate to `Dashboard` > `Updates` to see available updates and install them promptly.
3. Backup Before Updating:
Always create a backup of your site before performing updates to avoid losing data in case something goes wrong. Using a reliable backup pluginA plugin is a software component that adds specific features and functionality to your WordPress website. Esse... More like UpdraftPlus can make this process easy and efficient. UpdraftPlus allows you to schedule regular backups and store them in multiple remote locations such as Dropbox, Google Drive, or Amazon S3.
Additionally, keeping your WordPress installation up to date helps minimize errors and ensures optimal performance. Regular updates not only enhance the security of your site but also bring new features and improvements that can help your site run smoothly.
Consulting with a Developer
While basic error management can be handled by most WordPress users. Complex issues may require professional expertise. Consulting with a developer can provide several benefits:
1. Expert Diagnosis: Developers have the skills to diagnose and fix complex PHP errors that might be beyond your technical knowledge.
2. Custom Solutions: A developer can create custom solutions tailored to your site’s specific needs, helping to prevent recurring issues.
3. Security Enhancements: Developers can ensure that your site is not only error-free but also secure from vulnerabilities that could be exploited by hackers. By integrating robust security plugins such as Wordfence Security, Sucuri Security, or iThemes Security, you can add an extra layer of protection to your website. These plugins offer features like malware scanning, firewall protection, and real-time threat defense, significantly reducing the risk of security breaches.
When in doubt, or if faced with persistent issues. Do not hesitate to seek professional help to maintain the health of your WordPress site.

Conclusion
Turning off PHP errors in WordPress is a critical step in ensuring a smooth and professional user experience. By understanding when and how to manage these errors, you can maintain a secure and visually appealing website. Always remember to disable PHP errors in your live environment to avoid exposing sensitive information and to keep your site looking its best.
Regularly monitoring your site’s performance and addressing any issues in a controlled environment will help you maintain a high-quality WordPress site. You can ensure that your website remains secure, user-friendly, and free from unnecessary distractions.
By following the best practices for managing PHP errors. You can ensure that your WordPress site remains robust, secure, and user-friendly. Taking these proactive steps will not only improve your site’s performance. Also, provide a seamless experience for your visitors.
Looking for fast WordPress hosting with seamless updates and error-free performance? Resolve errors effortlessly with our hosting packages. Click the button below to learn more:

